3D Printing My Pelvis from a CT Scan
A few months ago I bought my son a Creality LD-002H Resin 3D Printer so we could play around with printing some simple objects. Like most people, we watched a lot of videos to get a better handle on how to (safely) work with resin, printed a bunch of example objects from Thingiverse, and then watched more videos to figure out how to make better prints. While printing models has been fun, I'd really like the kids to get a better handle on how to create their own objects through photogrammetry tools like Meshroom or editors like Blender.
The last few weeks I've been working through the details of how I could convert and CT scan of me into something I could print. Through a combination of open-source tools I was able to generate a mesh model of my pelvis and print a small version of it. I seem to forget how to use all these tools after a few days, so this post is just some notes for me to be able to recreate the process in the future.
Viewing CT Data in 3D Slicer
Back in 2013 I had to go to the hospital because I had a bad infection that needed surgery. The doctors ran me through a CT machine to get a better view of what was happening inside me. After my surgery I learned that Kaiser will burn a CD with your data on it for only $20 if you ask them. Being curious, I ordered a copy and poked around with it for a bit. While the data isn't in a format that I recognized, a viz friend pointed me at a tool called 3D Slicer (based on VTK) that's designed to look at medical data. It's a little confusing to get started, but you basically:
- Start Slicer
- Use 'Add Data' to point it at your CD
- Use DICOM to see the available entries in the data
- Select the entry with scan data (eg SAG 3MM) and Load
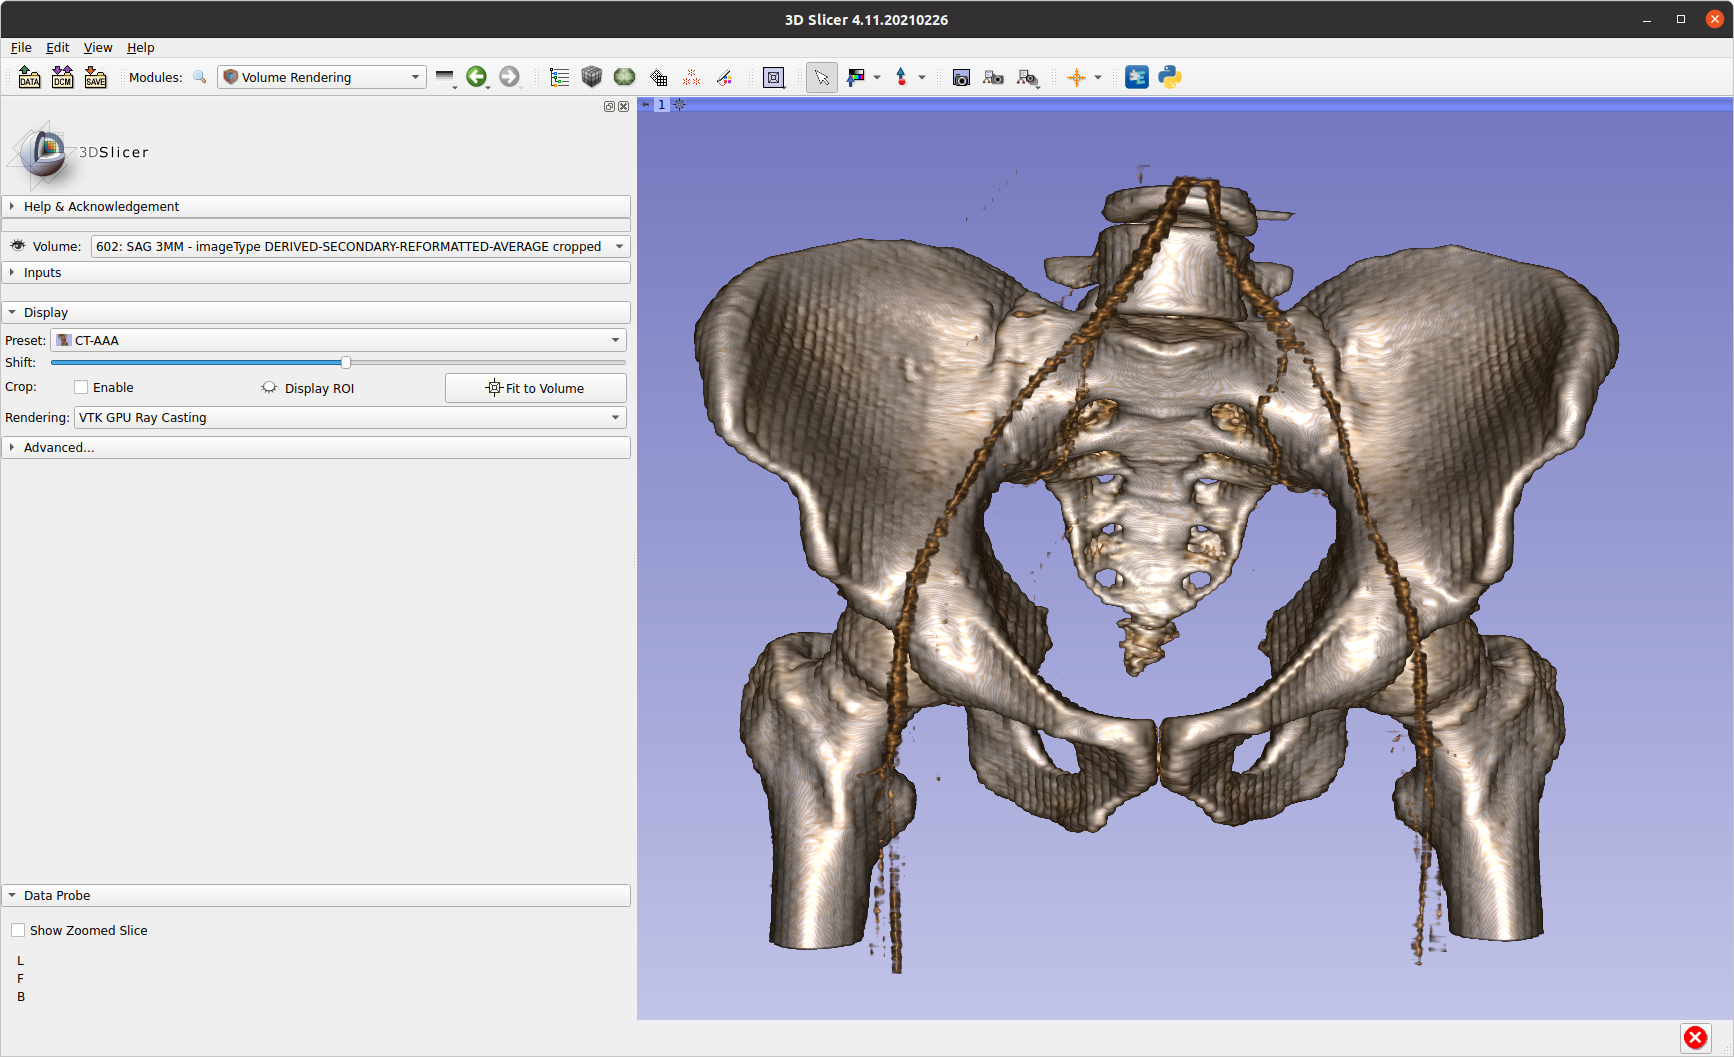
- Change to volume rendering and open the eye icon
- Adjust the Shift value to change the threshold level
I always stumble around with the default view settings. Usually the problem is that I haven't loaded a DICOM entry with anything in it (eg, a patient record) or I forgot to tell Slicer to view the data by turning the volume's closed eye into an open eye. Once the 3D data shows up, I switch to a 3D-only view by selecting View and Layout.
Extracting and Smoothing Contours
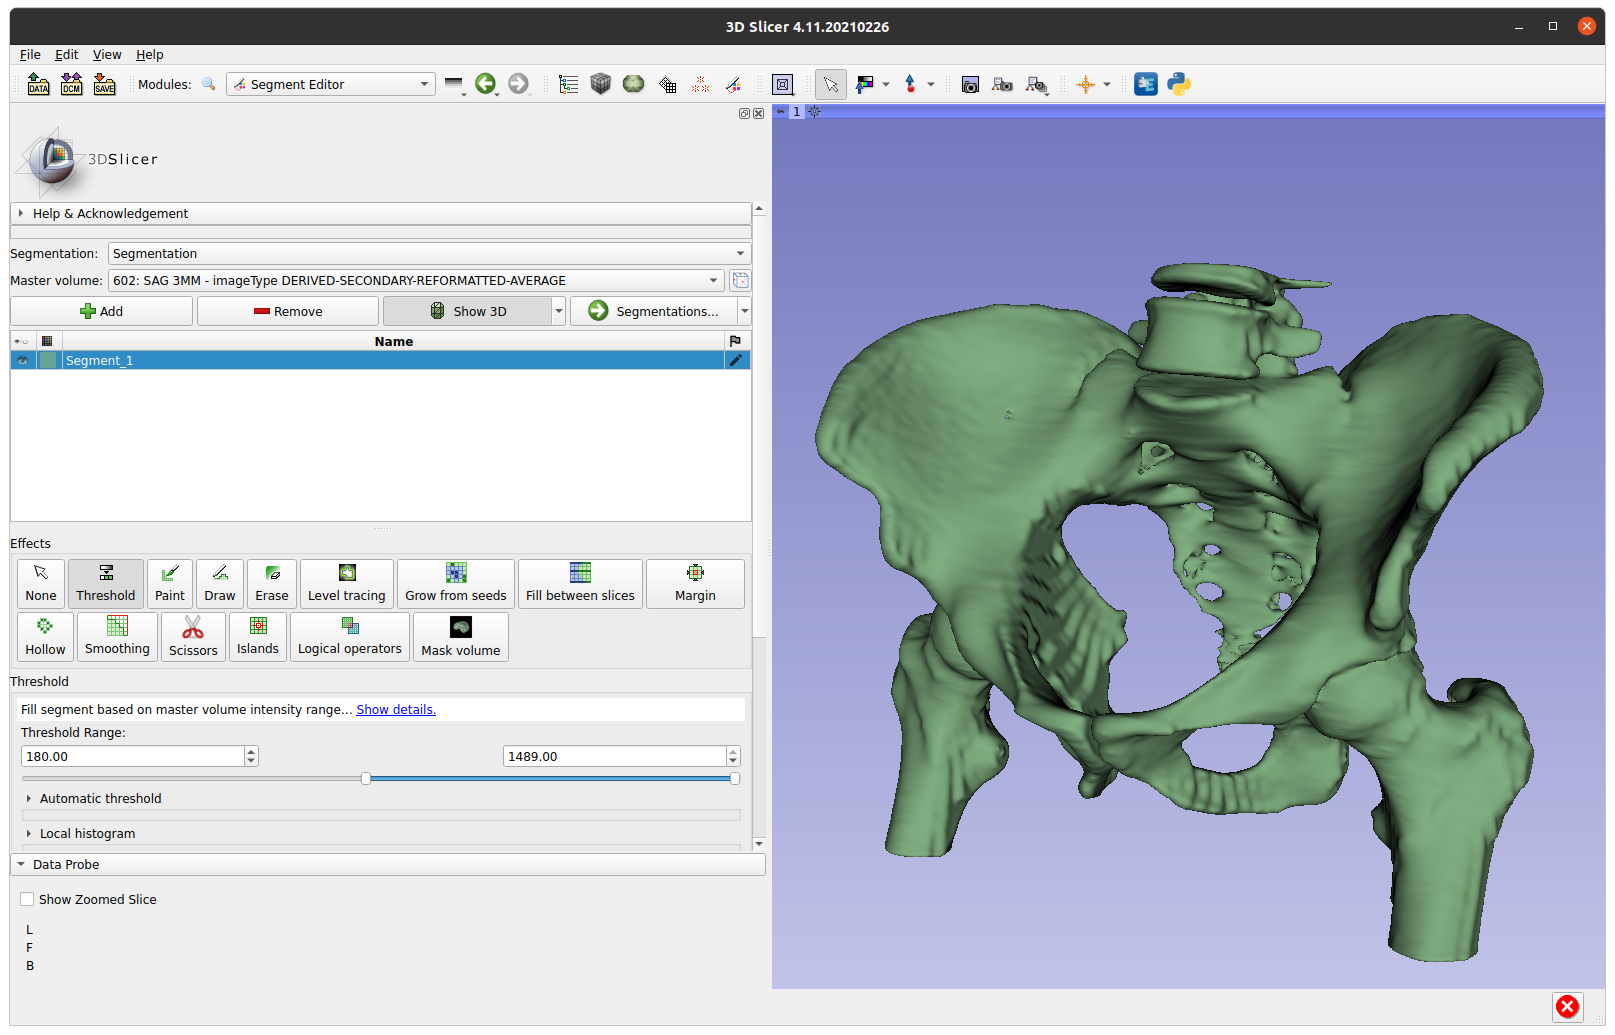
While the volume rendering tool is a nice way to poke through the data, what you really need to do is extract the contour for the bone so you can extract it as a mesh (ie, isosurfacing). To do this you need to run the Segmentation tool to build a mesh and then smooth it to make it more printable.
- Turn off the volume rendering
- Switch to the Segment Editor
- Select the Master volume to segment (note: default may not be right)
- Add a new segment and click Edit
- Click Show 3D to view
- Select Threshold, pick a value, and then apply
- Use Islands to remove background noise
- Use Smoothing to fix some bumps
It took some trial and error to find a threshold value that produced a good view of my pelvis (too low and you get tissue, too high and the bone starts disappearing). The two main issues I saw with segmentation were that some regions had small holes and some curving regions were bumpy like corduroy. Selecting the Smoothing option from the Segmentation options helped fix some of these problems. I'm sure you could do a lot more here to fix things- some of the videos I watched showed how to get precise segmentation by hand labeling points. I'm not printing an actual hip replacement so I didn't go into to much detail. Once I was done I clicked on the Segmentations button and exported to STL.
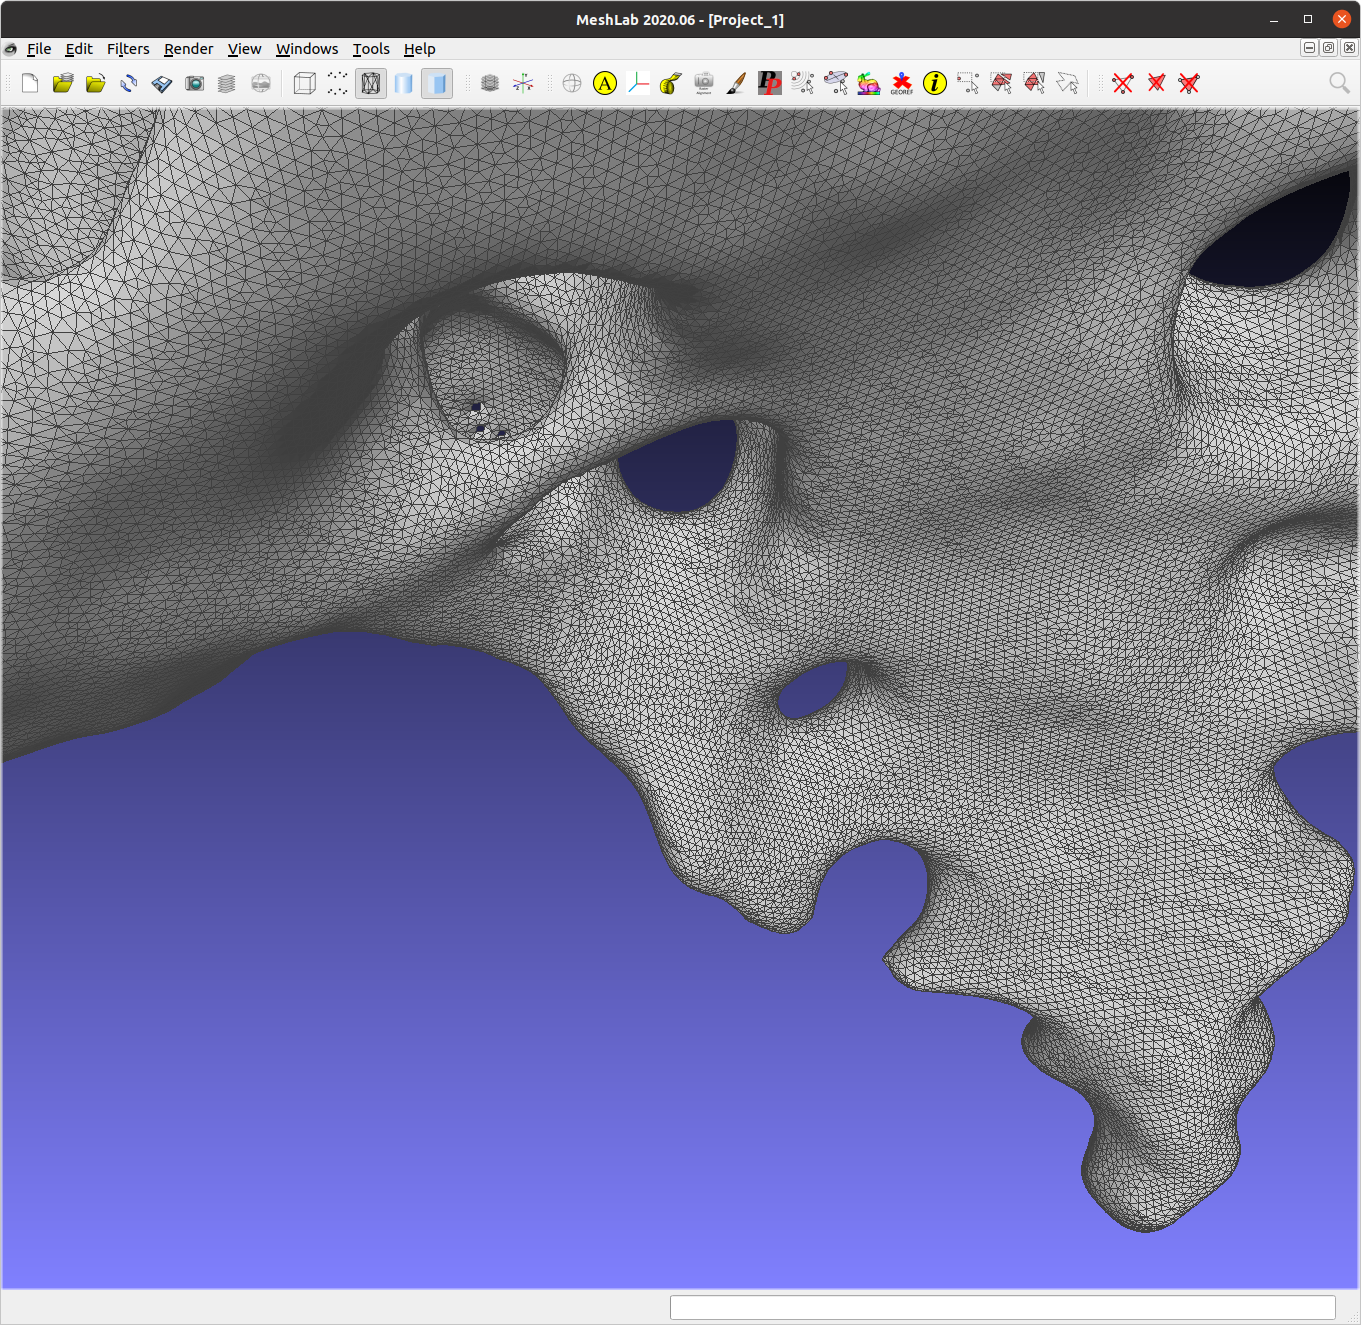
Cleanup in Meshlab
I pulled the STL file into MeshLab to verify it looked ok in another meshing tool and do some additional cleanup. While I think Slicer can do this cleanup, MeshLab seemed like an easier way to make some hand edits. I looked around in the mesh and manually removed some leftover polygons.
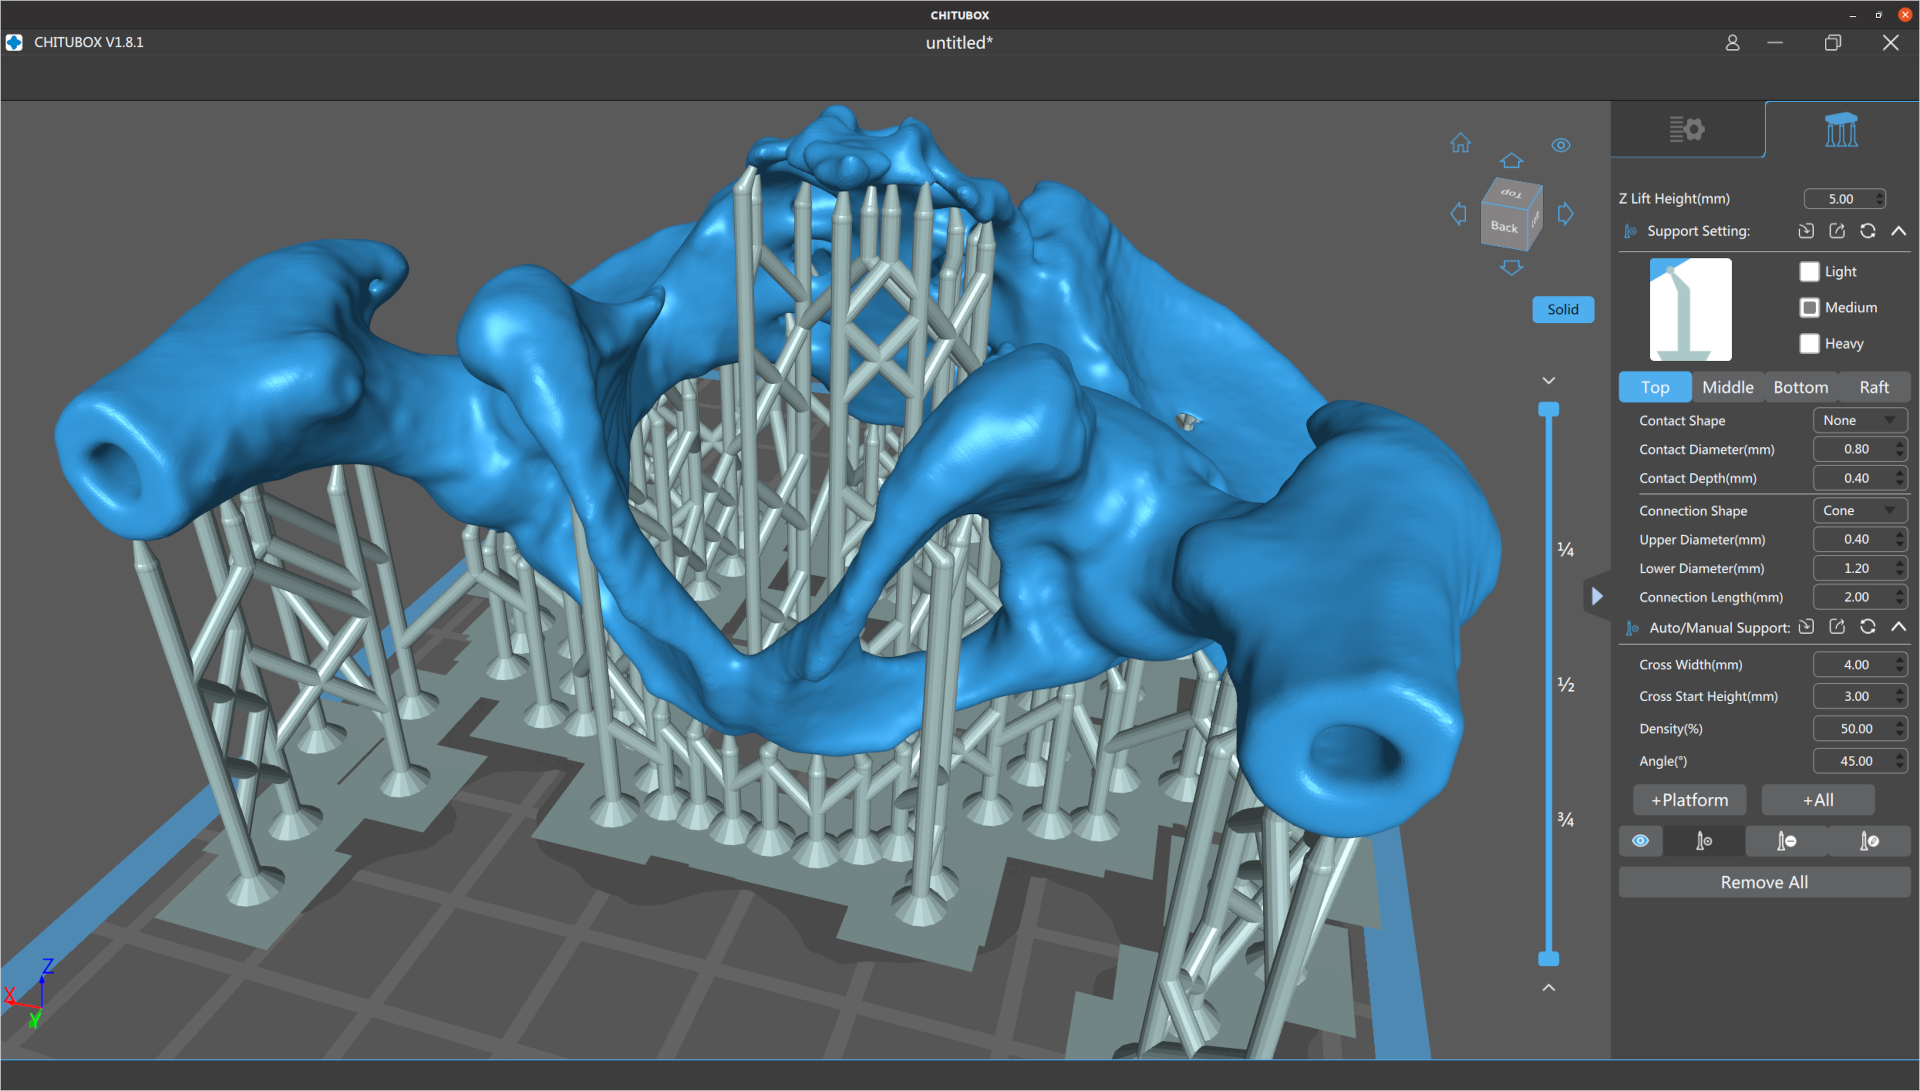
Adding Supports in Chitubox
The final step for me was to load the model into Chitubox to turn it into printable object. Chitubox is pretty amazing- it'll analyze an object and figure out what supports would be added to make it printable on a 3D printer. My neighbor does a lot of 3D printing and gave me a lot of tips on making good prints with Chitubox. eg, Make the back side of the model face the build plate so the supports don't leave bumps in important places, angle the structure to make it easier to build, use the skate support platform shape to make it easier to remove, etc.
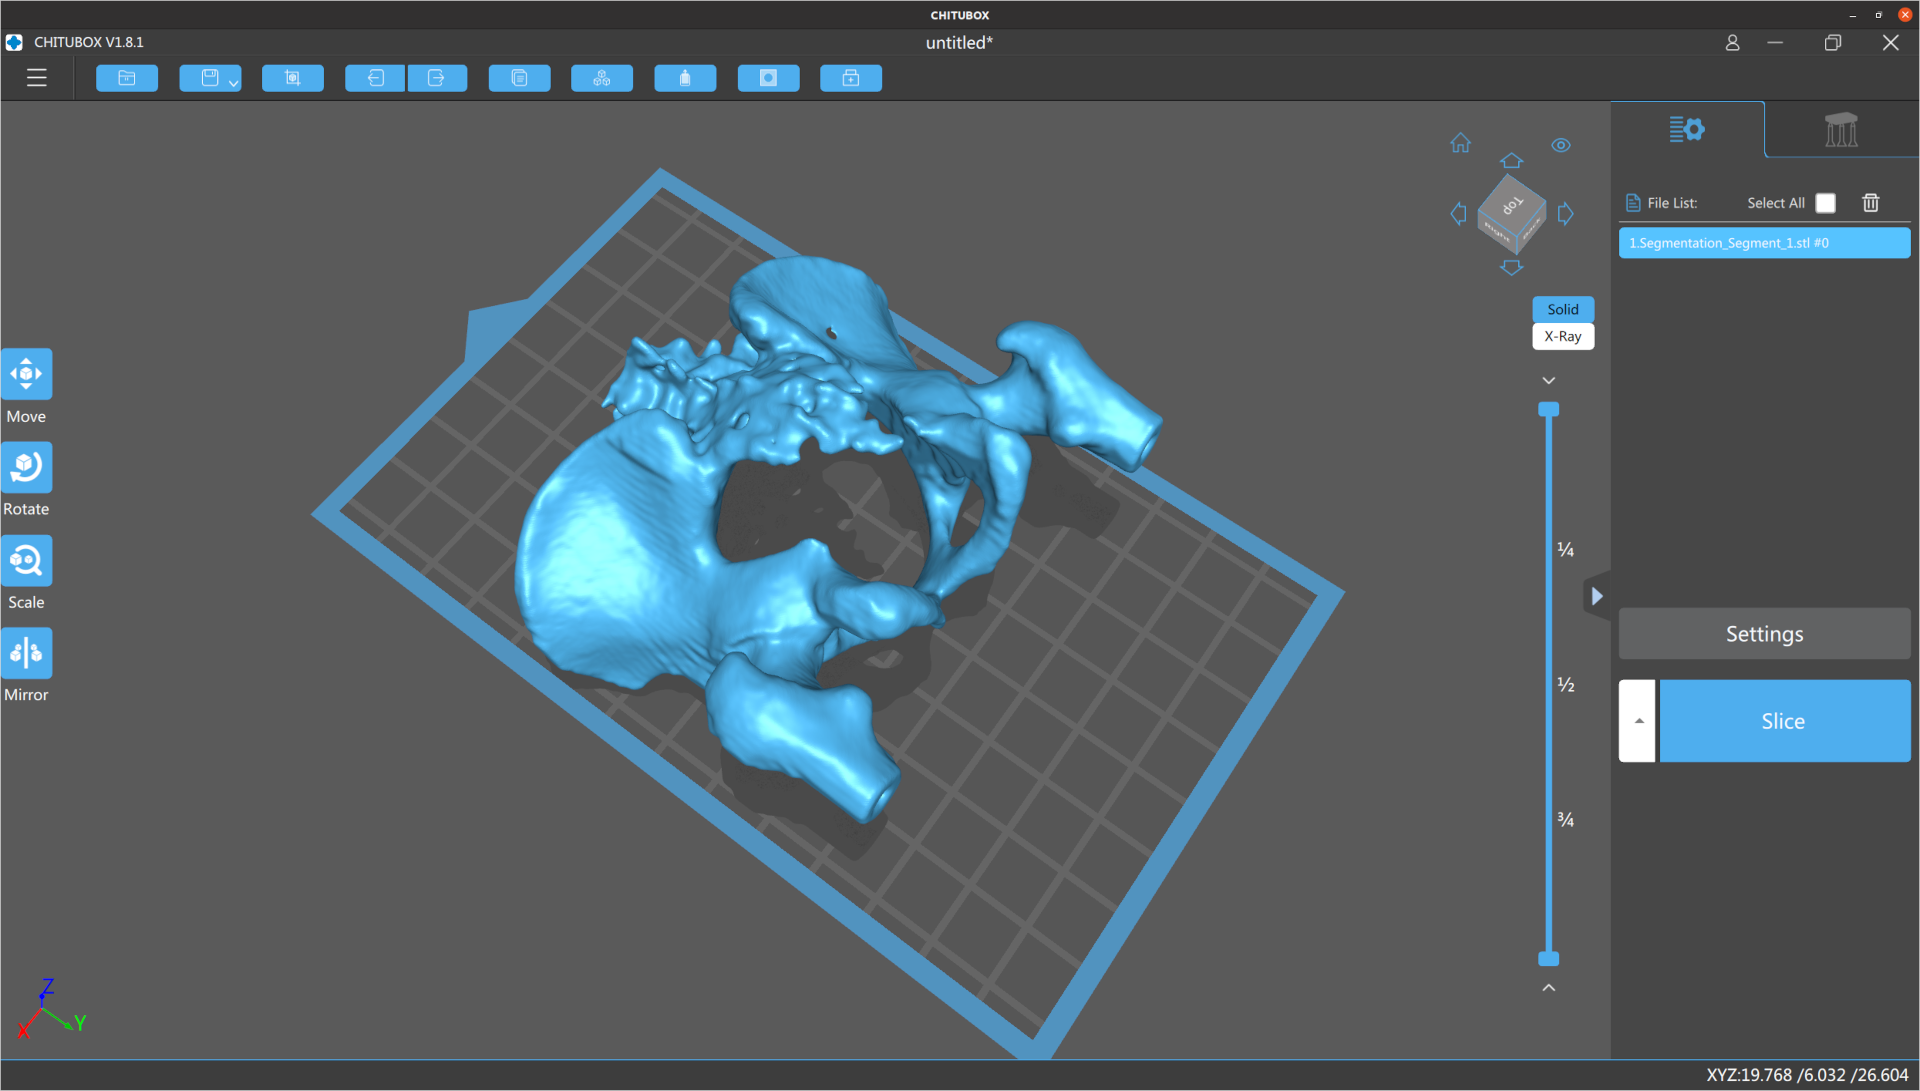
I manually placed the pelvis model and rotated it slightly, but pretty much used the default settings everywhere else. Even with a ton of supports, Chitubox still wasn't too happy with the printing risk. Once it was done I adjusted the print's first layer exposure time to 60s and the remaining layers to 6s. Based on previous prints, if you don't expose the first layer for long enough it doesn't stick to the build plate and your print fails.
Printing, Cleaning, and Curing
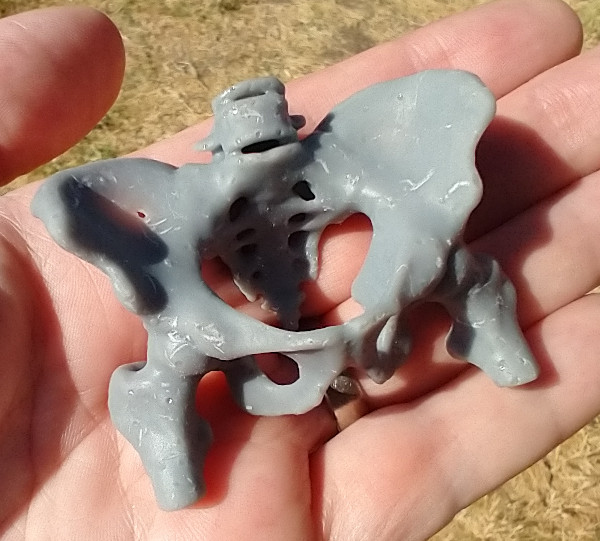
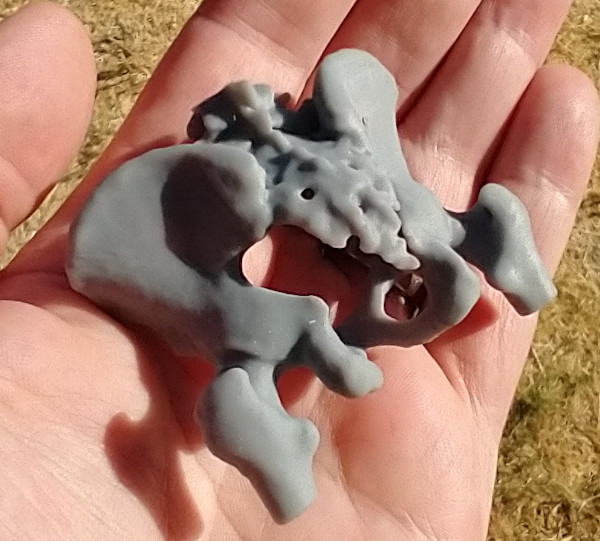
The final step was to take the model to the printer and print it out. Resin printing is a pretty messy and dangerous process. You align the print head (crucial!), pour resin into the vat, load the vat into the printer, and then print the model. This print took about four hours, but I didn't have to babysit it after I verified the first few layers had stuck. When it finished, I chiseled the part off the build plate and dropped it in a pickle jar (w/ strainer) filled with isopropyl to clean off the uncured resin. After a lot of shaking, I took it out and clipped off all the supports (which is unusually satisfying). From there I did another quick rinse in isopropyl, patted it down with paper towels, and put it under a UV light to cure it.
I'm still new to 3D printing but I think it looks pretty decent. The main problem with this print is that I scratched it up quite a bit when I was cleaning it up with paper towels (the print is still pretty soft at this point). In the future I'll probably buy a curing station which simplifies a lot of the cleaning and curing problems. The other problem with the print is that there are some extra holes in the back because I set the contouring threshold value too high. At least that's what I hope- maybe I just have really thin bones.
Safety and Cleanup
I should point out that the resin I'm using is toxic when uncured and it's important to follow safety procedures when doing this kind of printing. I wear disposable nitrile gloves and safety classes whenever I work with uncured resin, and crack the garage door to help vent the area. When it comes time to handling wet prints my neighbor suggested a practice of having one clean hand and one dirty hand, since there's always something you need to grab and you want to minimize what gets dirty. I use an excessive amount of isopropyl to clean up the build plate, vat, and tools when I'm done. Fortunately, you can just leave all the dirty towels and gloves in the sun for 30mins to cure them and make them safe for disposal.